Showing posts with label communication. Show all posts

Saturday

Collaboration with Gen Ed Teachers

Collaboration with general education teachers can be one of the hardest jobs of a special education teacher.  You need to find time to talk that fits in with both teacher's schedule.  Then if you have students in more than one general education class, you need to work out times with multiple teachers.

I have been teaching in the co-teaching and inclusion setting for the past 13 years.  Here are a few tips I have learned.

Document, Document, Document

One of the most important things I stress to all special education teachers (and General ed!) is documentation. Document the accomodations you are using with students and ask general ed teachers to do the same.  Document goals, document behavior and document communication.  I have a communication sheet that I use to document conversations between myself and general education teachers.  Some of my teammates use a notebook that goes between them and the general education teacher.  

Set up a time to meet

I have always had a set meeting with my general education teachers at least once per month.  I talked with them and we figured out what day of the week and time worked best, then added it to the calendar.  For example, last year, I met with a teacher the third Friday of every month at 8:15 AM.  This gave us a set time to discuss how students were doing or if we were co-teaching anything together, time to plan the next month.  Ideally, if you are co-teaching you have common planning, but lets be real, that does not always happen. 

Be open to change

When you are working with another teacher you need to be open to change and open to trying things a different way.  Learning new strategies and ideas can strengthen your teaching and help your student succeed. 

Check these out!

Here are some other place to find more ideas about collaborating with general education teachers. 

Monday

Picture Prompt Organization (Freebie!)

A few years ago when the teacher toolbox craze hit I really wanted to hop on board, but it did not happen until last summer.  I decided to make a toolbox not only for my supplies, but also for my picture communication system.  I decided to wait to blog about it until I could see how it worked out.

 I must say, I  LOVE this system.  Anyone can come into my room and look for a picture they might need.  The drawers are labeled and all you do is pull out the pictures to locate the one you need.    The pictures are also easy to put away, although I do keep a small basket right in front of the toolbox to throw pictures in.  Then a classroom volunteer can quickly go through and put them away.  I found throughout the year that I needed drawers that were just for a certain student (The bottom drawers are specific to students which is why they are blacked out).  So I just wrote their name on one of the blanks.These worked great to keep student specific pictures organized.


I also love my toolbox with all of my supplies it, This made is super easy for all the paraprofessionals I work with to find things in my room instead of having to look on my messy organized in my way desk.

To make this I bought the blue toolboxes from Lowes.  They are Stack-On 18 drawer Storage Cabinets. Right now they are $19.96 each, however you can go through Ebates and purchase it online to get 2% back.  If you do in-store pickup then there is no shipping costs  (You can find out more about Ebates by checking out this blog post.).  I then made labels, printed them, laminated them and attached the labels to the insides of the drawers with double sided tape.


To save you some time I am going to share my labels.  I used graphics from MyCuteGraphics and fonts from Kimberly Geswein Fonts.


Ready to go get your copy?  Click here or on the picture to the right!!


 photo blogsignature2.png

Thursday

Sign Language


When working with beginning communicators I start using basic sign language right away.  (My own boys are no exception to this!) I will usually relate the sign language to the basic need of eating and start with the sign for more.  As the student grasps that these motions I am making with my hands mean something, then they will begin to use the signs also.  

To help students learn I have sign language in various areas of my room and also as my students PECS pictures.  Some of the words I teach include more, help, thank you, please, and sorry.  Also during circle time I sign the days of the week during the days of the week song, colors and letters.  Not only do my beginning communicators learn a way to express themselves, but my other students love learning another way to communicate.  

Do you use sign language in your classroom?  How do you use it?


 photo blogsignature2.png

Saturday

Beginning communicators

It seems that every year I am working with at least one child who is a beginning communicator.  I am always looking for new ways to teach and more information to teach myself and others how to best work with theses students.  I stumbled upon this great series by  PrAACtical AAC about Pre-intentional communicators.  I highly suggest that you go check it out at PrAACtical AAC.

In my classroom I use a combination of PECS (Picture Exchange Communication System), American Sign Language, and Augmentative communication devices to facilitate communication with my students. Over the next few posts I am going to talk about what I use and what I have found successful.  I hope that these posts will help others when working with beginning communicators.   Make sure you are following via email, bloglovin', facebook or Twitter so that you can keep up to date on all of the upcoming posts!!  photo blogsignature2.png

Sunday

My go to for boardmaker

If you been teaching Special Education more than a year then you probably know about boardmaker.  If not, then you have probably heard of it, but do not know what it is.  Boardmaker is a program where you can make communication boards, overlays, and lots of other cool stuff. There is a huge picture library (drawings) for almost anything you can think of.  I will admit that it is not a program that you can just jump into and go.  I think it takes some playing and reading directions to figure out some stuff, but once you get the hang of it you are good to go.
 

When I am getting ready to start a new project or looking for ideas for something I always check out a site that was called boardmaker share.  It is now called Boardmaker Acheive.  This is a great site because teachers, therapist, parents, anyone who uses boardmaker can upload various projects they have made using boardmaker and then as a member (membership is free) you can download these items for free!   You can also edit these items in boardmaker so a they fit your needs.  For example, the bathroom chart below I made after searching on Boardmaker Achieve.  I looked  at various ideas and made something that would work for my student. 


I have found so many valuable tools on Boardmaker Acheive such as a strip that I use to remind students how they should be sitting on the carpet or a choice board.  I hope this website helps you save a little bit of time that we all are so short on right now!

Wednesday

ESY happenings

switches
I am teaching ESY this year for 2 weeks while one of my best friends gets married, then she will take over for the remaining two weeks.   It is great because I get to work with and see in action other teachers who do the same thing as I do, but just at different age levels.  One of our speech pathologists has joined us also.  She uses a lot of switches to help our students communicate.  One problem I have always had was having a male voice on the switch for our male students.  Meghan showed me how to use the male voice from Proloque  for the switch.  How easy is that!


I thought I would share some pictures of the activities that we are doing.


Here Meghan drew circles on teh board and put questions inside.  The kids had to throw a plush baseball(we are doing a baseball theme) at the board and answer the question it hit.  This was a great activities to work on gross motor (throwing) and speech (answering a question).  The kids seemed really like it.  Also if you look really close you can see how Julie adapted our behavior clip chart to fit the theme.  (I will try to get close ups of that this week.)

IMG_6931                      IMG_6930


Another activity we did was making corn dogs using corn muffin mix and cut up hot dogs.  The kids made the mix and then cut up the hot dogs to put in the muffin tins.  Meghan wrote up the recipe for them to follow.
 
recipe

Here are the kids mixing and cutting.  Lots of great skills being worked on here!

IMG_7036IMG_7038IMG_7039


Are you teaching ESY this summer?  I would love the hear about the activities you are doing.


 photo blogsignature2.png

Saturday

puzzles

puzzle, fine motor, learning ahoy, special educationpuzzle, fine motor, learning ahoy, special educationWe do a lot of puzzles in my classroom. Puzzles work on fine motor skills, orientation, and also social skills. Sometimes I will have the kids all work on one big puzzle together. However a few days ago they each were working on their own. This provided the opportunity to ask each other for help (I am sure if you read the post about making lemonade then you now have realized that we are working on asking peers for help instead of adults). I keep a lot of different puzzles in my room so that there is variety and a puzzle that everyone can be successful at.


puzzle, fine motor, learning ahoy, special education


  Photobucket

Monday

Making Lemonade


 Sometimes the simplest activities can be the most fun!  This past week for our cooking activity (life skills, measurement  reading) we made lemonade and then delivered it around the building (social skills & communication) and the kids loved it! It was so easy, but we got so much out of it.


We started with gathering the items we would need.


Next the kids tried to open the container of lemonade mix.  This was difficult and I had them ask each other for help before they could ask me. 

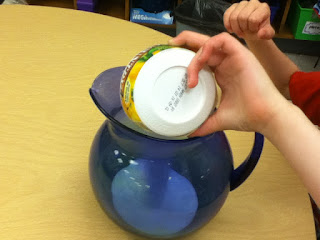
We read the directions and decided how much mix we would need.  Then each person took turns pouring the mix into the pitcher. 


Next we read to find out how much water we needed.  We then took turns filling up the measuring cup and pouring the water in. 

Then it was time to mix.


Finally, we were ready to drink up!!


Photobucket

Saturday

Social Skills: Question of the week


Each week on Tuesday my students do a "Question of the week". They each have a sheet with a question on a clipboard.   We practice asking the questions in the classroom to each other.   Next, We walk around the school (usually to the front office, cafeteria, nurses office, etc.) and ask our question of various people. Some students do this verbally while others use a communication device. This activity allows us to practice social skills by giving students the opportunity to start a conversation with someone by asking a question. Some students record the answers themselves, while others will ask the person to record the answer.

I have the sheets printed out and in a folder all ready to go a few weeks ahead of time.  I have found a lot of great questions on Make Learning Fun (if you have not checked out this website, I love it!  Lots of great ideas on lots of topics).  There is section called Question of the Day. The questions cover all types of content and I often am able to find one that fits in with our current theme.

I have received a lot of positive feed back from our question of the week as it allows others to get to know my students more and allows my students to become more comfortable talking to various people in the school building.


Valentine's Day(week) Activities

Wow! It feels like February is just flying by! We did a few different activities to celebrate Valentine's Day that I wanted to share.

We used the Valentine Hearts to practice sorting by color and counting.  When we started sorting I realized there was not enough of the hearts to sort onto for the colors we had.  I decided just to wait it out and see what the kiddos did.  It was really interesting to watch.  One made his own spot on the paper to add his blue hearts and one of the others decided to put his hearts on his neighbors pile of yellow hearts.   What great problem solving!

We made cards for our parents by taking a coffee filter heart and using washable markers to color it.  Then we used a water sprayer (I can not think of the name of it right now) and squirted our hearts.  I put the heart on a cookie sheet when the kids sprayed so that I could try to contain some of the water.  Of course I forgot to take a picture of this!! After the hearts dried we glued them onto a piece of pink paper and decorated them.

We also made cards for various people in the building.  I used the die cut to cut out hearts and then made labels that said Happy Valentine's Day!  The kids then stuck the labels onto the hearts.  We put them in a basket and delivered them to our office staff, past teachers, etc.  The kids had to hand it to the person and say Happy Valentine's Day.  This activity helped to work not only on fine motor(putting the stickers on the heart), but also communication and social skills. Of course I completely forgot to take pictures of the hearts.


We also have been using hearts to practice our numbers.  Similar to the way we practice our sight words with shapes on the floor.  We do the same thing with numbers.   I used the same hearts as last year and it made me realize how far some of my kids have come.  Last year I had a student working on numbers 1-5.  This year that student was finding all of the numbers for 20-30.  Amazing!
    Photobucket