Showing posts with label sensory. Show all posts

Sunday

Sensory Bin Fun!

Do you use sensory bins in your classroom?  This year I have decided to implement sensory bins with my preschool class and the bins have been a huge hit! I wanted to share some of what we have used so far that has been successful.

Base Materials:

I have used a variety of base materials to get our bins started.

Add ins:

Some of our bins include the base material and then just stuff to scoop and play with such a cups and funnels.  In some of the other bins, I put various items that the kids can hunt for.  Here are a few examples:
  • plastic/foam letters
  • small pumpkins
  • bugs
  • plastic shapes
  • numbers
  • mini erasers
  • items that match our current unit

Tips:

  • Limit the number of students per bin. I only have two students per bin. 
  • Set rules.  I tell the children that they can not throw the items around and need to keep the "stuff" in the designated areas.
  • Use lunch trays to help contain. 

I am loving how these are all working in my classroom and plan in making a variety throughout the school year to fit with our units and the time of year.  I am still working on organization, but once I find something that works I will share! 

 I would love to hear how you use sensory bins in your classroom.  Please share in the comments below.


Friday

Multi-sensory learning

Multisensory education is proven to be effective with, no only students with disabilities, but all students.  Multisensory learning is learning that involves two or more sense.  This means children will take in information more than just auditory (ears) or visually (eyes).  They use a combination of the senses to learn new skills and practice previously taught skills.


I know what your thinking, "Caitlin, I don't have time to add in one more thing to my day".  The great part is, you are probably already doing some of this. Other things are just minor tweeks and you are on our way to involving multiple senses.

multisensory learning: smelly markers
One of the easiest things to incorporate are smelly markers and smelly pens.  I use these for the kids to draw and color with, but also when writing their letters or practicing their word sort words.   The kids love to use them and I like to giggle when I see the little dots under their noses.


multisensory learning: sandpaper

Sandpaper is another great multisensory tool.  You can have students place the sandpaper under their paper and then use various writing instruments (Take those smelly markers back out!) to have them write or draw with. The rough texture of the sandpaper provides some additional tactile input.  I found a stack of over 30 pieces of sandpaper at the Dollar Tree.  I have also cut letters, shapes and numbers out of sandpaper so that students can rub or trace over it and form that shape.


multisensory learning: gel board

Another great attention grabber is gel boards.  I have various versions of these.  The first comes from Wilson.  We bought these to use with students when we had the Fundations program and now I use them with my kiddos who have Orton-Gillingham or Wilson instruction.  The kids use the stylus to write and then erase with their hand.

multisensory learning: gel bag


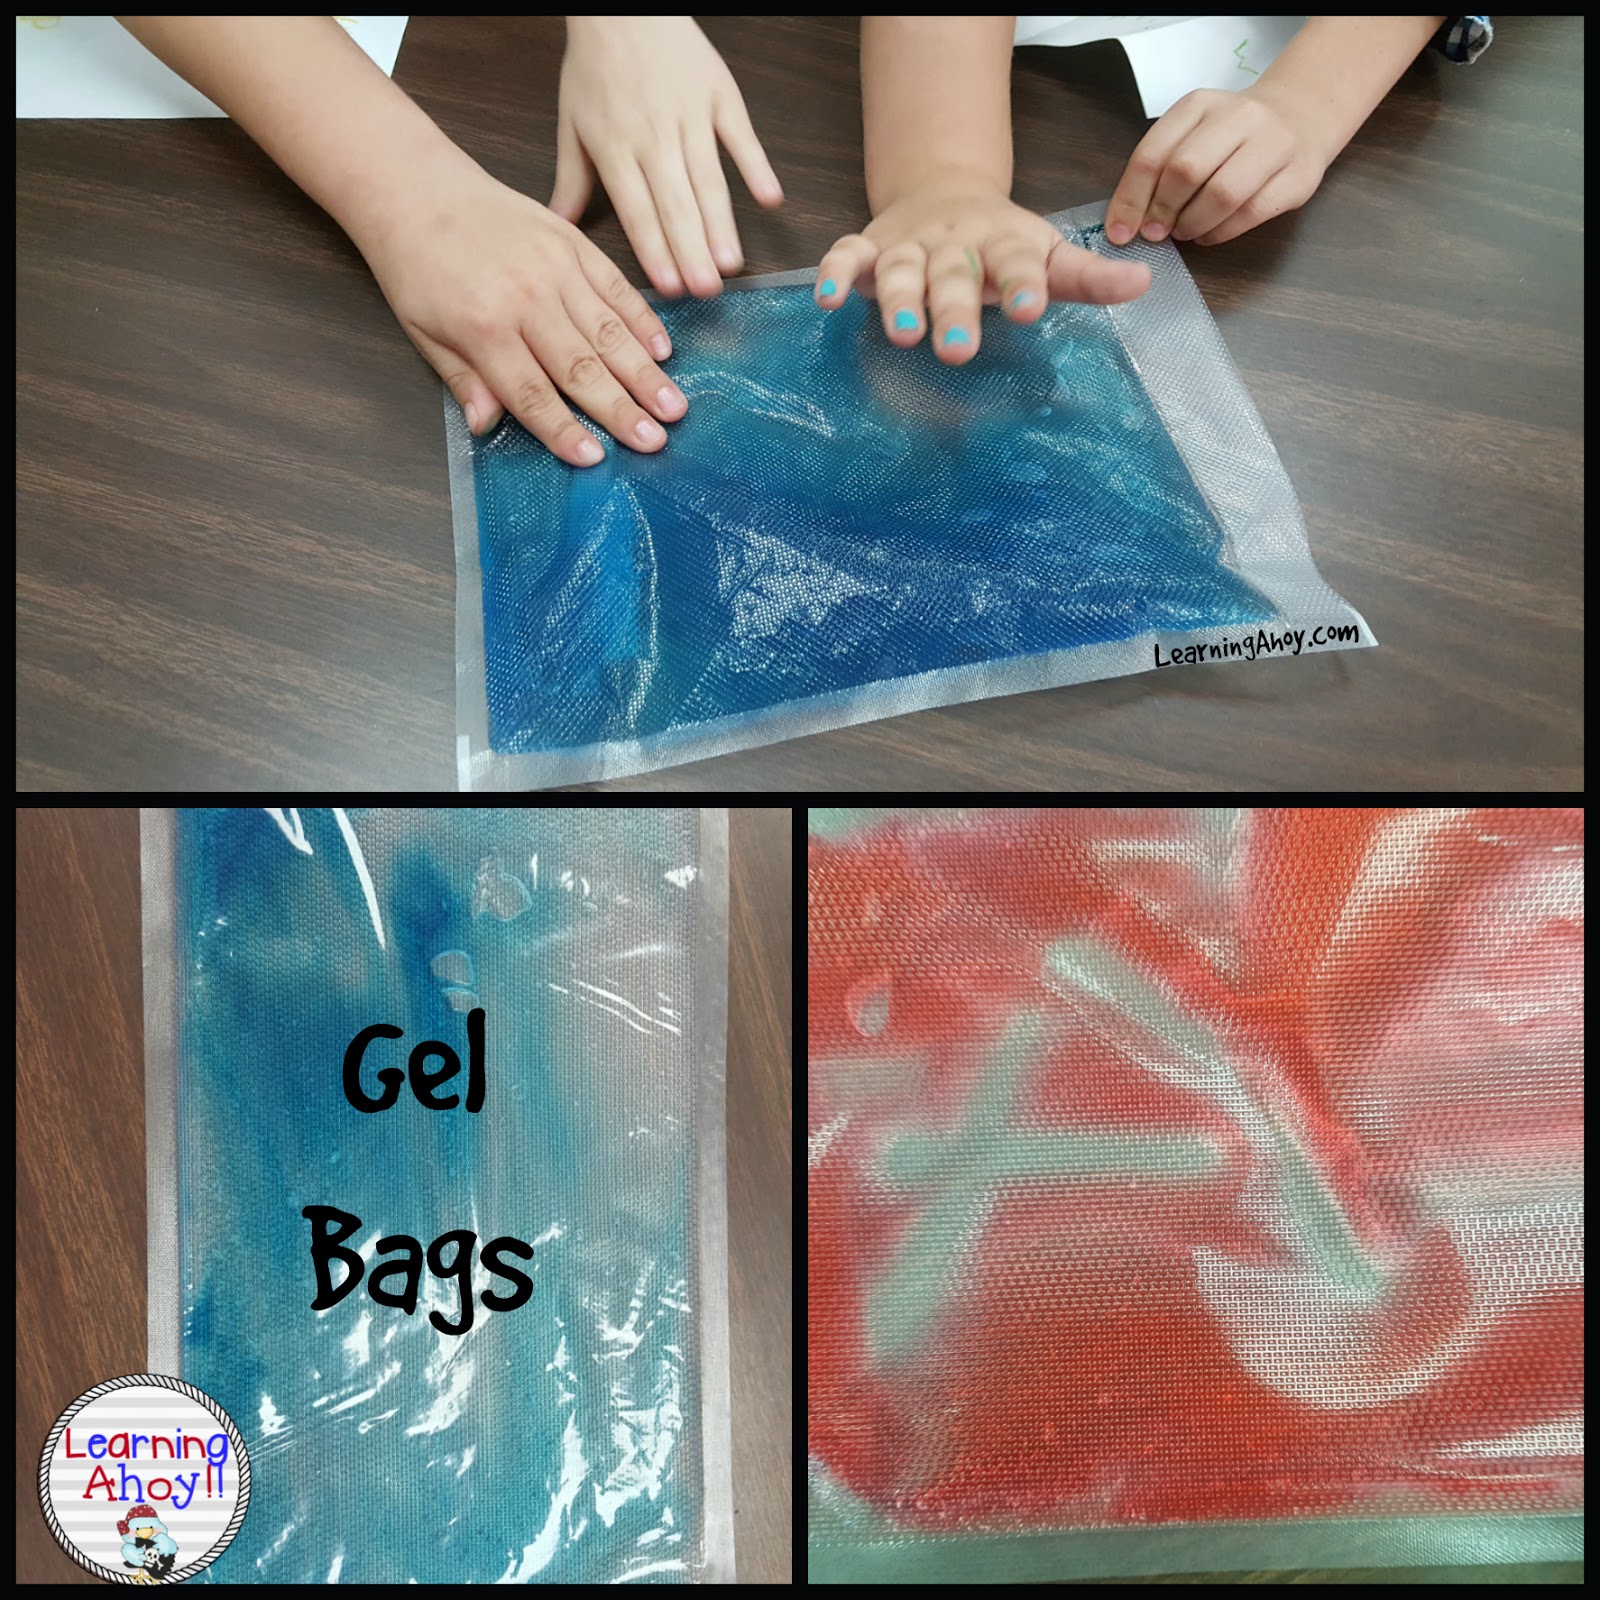
I have also made my own gel boards. My students use gel bags to practice writing letters, words, numbers, shapes, or just to play around with.   Last year I shared these boards that I made with freezer bags, hair gel and food coloring.  They are great, but leak easily.  At the beginning of the school year I stumbled across this blog post from Capitals First! about making durable gel bags.  Well, I wrote a grant to get the food sealer and I am in love.  These bags are not only easy to make and hold up to more love from students, they provide additional sensory input.  The seal-a-meal bags have a texture to them on both sides, but I found a roll of bags on Amazon and those are textured on one side and smooth on the other.  My students just can't get enough of them!


multisensory learning: boogie board

The last tool I am going to share today is Boogie Boards.  I was first introduced to these little devices a few years ago by an awesome PT we had.   They have gained popularity in our school and no the company has come out with all different types.  The new ones have a place to store the stylus, you can change the battery, and they have magnets on the back so they can stick to your white board or chalkboard.  To use you simply write on the board with your stylus and then press the button to erase.  I took these out today use my students to introduce and get the play part out of the way.  I didn't even have to ask them to write their alphabet, they just jumped right in.  These boards can be used writing letters, words, numbers, math problems, answering questions and the list goes on.  Yes, they are a more expensive white board, but they add to the engagement factor for some kids.

There are a lot of other ways that you can add multisensory learning into your day (shaving cream, move & sit cushions, wobble stools, etc) and this is just the tip of the iceberg.  I would love to read about the various tools you use in your classroom.  Please share in the comments section below.


Sunday

Shaving cream pumpkin

Happy October!!!

Shaving Cream pumpkinI just wanted to share this quick activity I did with my 2-year-olds a few years ago.  Unfortunately, I only have one picture(insert sad face).


I am a huge fan of using shaving cream and glue to make a paint.  It smells great, the kids can use their hands, and it is such a great sensory experience.

To make out pumpkins, I printed out a pumpkin outline on white cardstock.  The kids and I worked together to mix the shaving cream, glue, and some red & yellow food coloring.  They each took turns stirring.  We then used out fingers to put the "paint" on the pumpkins.  I put the paper on old lunch trays so that I could contain the mess and move them easily to dry.  After the pumpkins were dry I cut them out and hung them up.

You can also add faces to the pumpkin by having precut shapes, from construction paper or even the foam shapes,  that the kids can stick on to make a face.  The shapes will stick to the shaving cream once dry.
Shaving Cream pumpkin


If you would like to see other activities where I have used shaving cream and glue, check out this post about snowmen by clicking here and another one here.


Making snow!

Making snow with baking soda and shaving cream
We do not get a lot of snow here in our little corner of Virgina so I decided to make snow with my kiddos to play with.  I had never done this before and am super excited how awesome it came out.  It was even cold!!! I was able to send each student home with a little baggie of it to show to their parents.  I made sure to include a note so the parent knew what we were up to!

Make your own snow!

Here is what you need to get started: baking soda, white shaving cream, and something to mix in (or just the table top)

To make this all we did was mix baking soda and shaving cream.  I didn't measure it, I just squirted out some shaving cream on the table.  I then add baking soda.  I kept mixing and adding until the consistency was that I could mold it. It kind of felt like playdough. 


The kids had no problem digging and getting dirty.  We were able to roll to make a tiny snowman. You could also make a container of it and hide letters in it for a sensory hide and seek. 

In case your are wondering, eventually when left out it dries us and turns into a powder.  It took about 24 hours for this to happen.  I am not sure if you left it in a closed container how long it would last. 


Wednesday

Shaving Cream Snowman


This is one of my favorite activities that we do during the school year.  So simple, but the final product is awesome.

Last week we talked about snow.  One of the activities we did was making a snowman using shaving cream and white school glue (Elmer's is the brand we used).

I prepped the project by drawing 3 circles on large blue paper so that the students had an outline for their snowman.  I also precut hats, buttons, eyes, nose and the mouth out of scrapbook paper.  I have a silhouette ( type of die cut machine) that cut out everything for me.  This was a huge timesaver! (If you have the same machine and would like the  file, leave a comment below).

I started by having the kids mix the shaving cream and glue in their own containers.  We used equal parts shaving cream and glue and stirred with a popsicle stick.

Next the kids start spreading the mixture onto their snowmen.  The thicker the better (makes for an awesome texture).  Each student ended up needing two bowls of the "paint".

After they had their snowman painted, we added the details.  I forgot to take pictures as we were decorating, but I think the final product gives the idea.  The kids were each able to pick which ever hat, scarf and buttons they wanted.  They had to add 5 "pieces of coal" for the mouth and 2 for the eyes.  They were able to just stick each part onto the snowman.  Once it dried everything was stuck.

I love the way these came out and they have been a big hit hanging in the hallway.  I let the students touch the one I made the next day so that they could see how neat it felt.


 photo blogsignature2.png

Sunday

Golf ball painting: Making Valentine's Day Cards

My class is participating in a Valentine Exchange with classes from around the United States and Austraila. I was trying to find a way to make 25 Valentines with a class of 6 students and decided Golf Ball painting would be so much fun!

It is really super easy.  We use box tops from from cases of paper and add whatever it is we are painting(in this case it was hearts).  We then add two golf balls and some paint.  The kids maneuver the box top to roll around the goofballs and paint the paper.  The design is so neat because it has a textured look.  

Only thing to watch for is flailing hands as we had some hit a box just right and paint covered golf balls went flying through the air.

You can find  Valentine Freebies here!

Intro 5 senses with pumpkin!!

The craziness of back to school sure has hit me hard!!! Between back to school night, t-ball games, social skills group, and drs appointments we have been running around silly this past week. I am hoping I can jump back into the blog world so that I can start sharing all of the new stuff we have been doing!


IMG_0995
IMG_0988One thing we did that was a huge hit with most of the kids was sensory play with pumpkin.  Most LOVED it!  Two would not even touch it.  We used the pumpkin on the day we introduced our unit on the 5 senses. It was something we already had and it enabled us to talk about the smell, taste, touch,  the way it feels and the way it looks.  I also introduced the word prediction when I asked them to predict how it would feel.  The other teacher I work with made a chart in her classroom of all the words they thought of to describe the pumpkin.


IMG_0986
 photo blogsignature2.png

Wednesday

ESY Fireworks


I saw this awesome post on Praying for Parker where Parker worked on a painting activity for the 4th of July to represent fireworks.  I loved it and thought, “What a great idea for ESY!”  My co-teachers loved the idea also so we planned on doing this activity outside the Monday before the 4th.  We were going to tape the paper to the side of building or put it on the ground depending on ability levels.  Well, it rained, so our plan changed a bit.  Here is what we did.


We gathered our supplies which are porcupine balls, WASHABLE paint, paper plates, and paper.  We put the paper on the floor, on top of a bit piece of bulletin board paper, but a sheet or table cloth would work great also.

ESY Fireworks Painting ESY Fireworks Painting


The kids took turns squeezing the paint onto the plates. 

 ESY Fireworks Painting ESY Fireworks Painting ESY Fireworks Painting


Then they all stood behind a piece of paper and waited for their turn with a color. We put a few of the balls in each color and the kids dropped the ball onto their paper.

 ESY Fireworks Painting  ESY Fireworks Painting ESY Fireworks Painting ESY Fireworks Painting


So these are the finished products.  Overall it was fun, but a bit messy.  We had lot of adults helping out, but a few kiddos still managed to get pain on their clothes.  They would get it on their hands, not like the feel of it and wipe it on their shirt or shorts.

   ESY Fireworks Painting ESY Fireworks Painting


I am going to be going to visit family and pick up B (He has been with my mom since June 24!) tomorrow, so I have some great guest bloggers lined up for the next few days!  You are not going to want to miss their excellent posts.  Make sure you are following through email, bloglovin, or one of the other options!


 photo blogsignature2.png

Thursday

5 senses: Taste

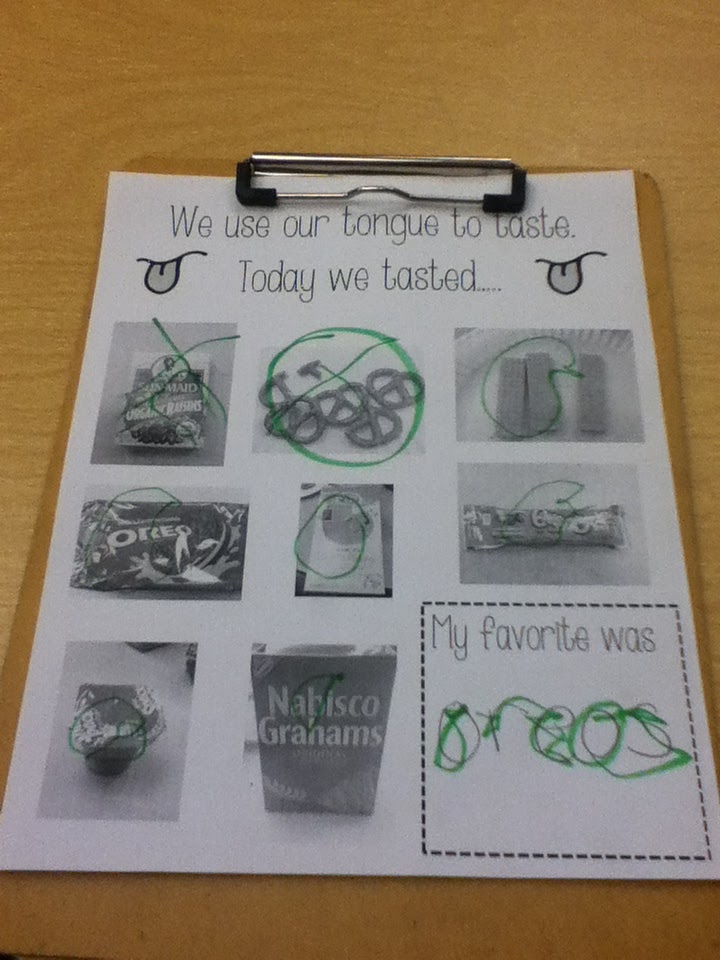
We have been working on our 5 senses and for the sense of taste I wanted to have the kiddos try different foods. We were going to have banana, pretzels, lemon, a sour patch kid or two, and probably a few m&ms. However, in traditional busy mom/teacher fashion I forgot to buy bring the tasting items to school. So what is a teacher to do? I quickly assessed what we had in the cooking drawer and went from there. We tasted a lot of different kinds of cookies, but they got the idea. We talked about what we were tasting and they had to decide if they liked it or not. If they liked it, then they circled the picture, if they did not like it, then they drew an X over it. One of my students just could not wait to get the vanilla sugar wafers. He was practically jumping out of his seat. I don't know if he even tasted it when I gave it to him. The kiddos really seemed to enjoy this activity (Food is always a great motivator).


Photobucket

Monday

Sight Words: sensory


I know you are probably thinking, what else could she possible have to say about sight words. Being a believer in multiple intelligences and that we all have different learning styles, when teaching sight words I try to teach to everyone's learning styles. I am sure you all know sensory stimulation, or lack there of, is huge for our kiddos with special needs. I provide for this in combination with practicing our sight words. Here are just a few ways:

Shaving Cream: practicing sight words and clean tables... what could be better! I am sure a lot of you do this already. We simply spray shaving cream on the table (a great fine motor skill) and the kids write their sight words in the shaving cream.

 Rice: A lot of people have sensory tubs and use them to hide various items in. I use a tub of rice and hide sight words in it. I have one student who just loves this activity. You have to admit that the rice over your hands does feel kinda neat.


  Photobucket